- Gatsby
- React
- JavaScript
- Material UI
Build a blog with GatsbyJs
November 28, 2020 • 10 min read
In this tutorial we will build a blog about different Holidays.
Overview
In this tutorial we will work together on using GatsbyJs to build a blog about different Holidays. This tutorial is intended to serve as an introduction to GatsbyJs, GraphQL, React, and Material UI. Before we can get started, here is what you will need installed on your machine.
Development Requirements.
Install the following requirements based on your Operating System.
Once you have Node and Git installed, we need to install gatsby-cli. The Gatsby Command Line Interface (CLI) allows us to run GatsbyJs commands for developing and creating new Gatsby sites.
Open a command prompt or terminal, depending on what OS you have, and run the following command.
1npm install -g gatsby-cli
This will install the gatsby-cli package globally on your machine and make Gatsby commands available for development.
Getting Started
To get started with our blog, we will create our site by using a starter site called Awesome Material UI Starter. This starter site comes with the following features by default:
- Material UI and Material UI Icons installed
- TypeScript & Type Checking (We will not be using this at the moment)
- React Helmet
- Offline Functionality
- Progressive Web App Functionality
- Prettier formatting Functionality
- Open a terminal/command prompt and run the following command.
1gatsby new holiday-blog https://github.com/flvyu/awesome-material-ui-starter
This tells Gatsby to create a new project called holiday-blog from the starter site specified by the git repo url 😀. I'm calling it holiday-blog but you can call it anything you want.
- Now run the following command to change to the directory called holiday-blog. We will be running all our commands from this location.
1cd holiday-blog
- Run the development server.
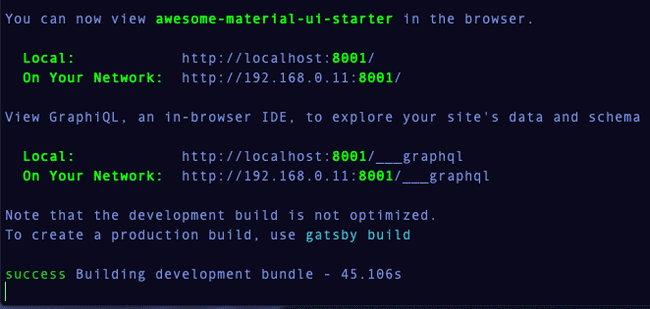
1npm run local
This command will run the script in the package.json labeled local. This script in turn will run
gatsby develop -H 0.0.0.0. The part after develop will make our blog available on a local network so you can access it
on your mobile device. In all, by running this command, a development server that will run your site is started. Go to
the url specified to view the site.
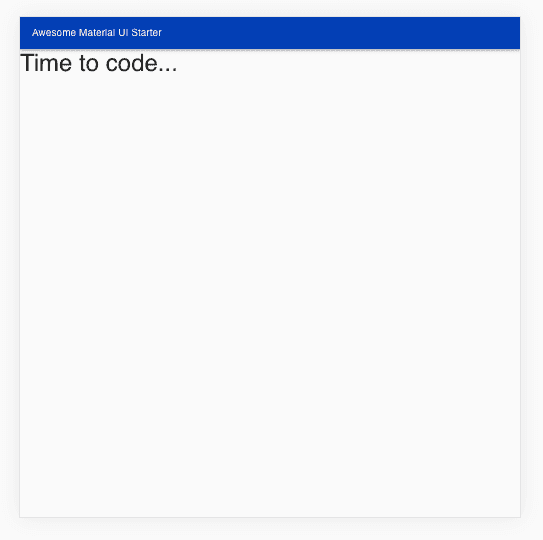
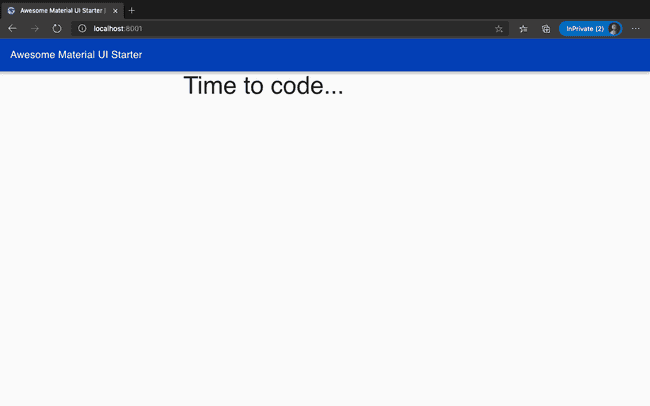
You should now see the following site.
Now that we have our starter site up and running, let's work on implementing the blog feature.
Implementing the Blog
To write the code for the blog, I will be using the VS Code editor, but you can use any code editor you prefer.
To style and develop the look and feel of our blog, we will be using the Material UI React Component Library.
Blog Features.
We are implementing a very simple blog, so the initial version will only have the following features.
- Rendering posts from data in markdown files located locally in our project folder.
- Routing to different blog posts.
Source Plugins
For our blog, we will be storing our blog posts in markdown files. In order to get the markdown data from local files in our
file system, we need to utilize a Gatsby Plugin called gatsby-source-filesystem.
We need to install the plugin, and then configure it so it knows where to look for our posts.
- Install the plugin to our
node_modulesdirectory.
1npm install gatsby-source-filesystem
- Inside the
holiday-blogdirectory, create a directory calledcontentand inside that create another directory calledblog-posts. The path should look like this:
1/holiday-blog/content/blog-posts
- Configure the plugin in the
gatsby-config.jsfile by adding the following code in the plugins array.
1{2resolve: `gatsby-source-filesystem`,3options: {4name: `blogPosts`,5path: `${__dirname}/content/blog-posts`,6},7},
From the configuration object, you can see that the value of the path key matches the path we had previously created in step 2.
Save your changes.
Now we need to stop and restart the development server for the changes to take affect. Stop the development server by going in the terminal window running the site and pressing
ctrl + con your keyboard. Once the server has shut down, go ahead and start it up again like we initially did.
Testing the Source Plugin
To show this plugin is indeed looking for files in the correct location, create a file called test.md in the blog-posts directory.
Now, open your browser and go to the following url:
1http://localhost:8001/___graphql
Past the following code in the GraphiQL editor.
1query MyQuery {2allFile {3edges {4node {5name6}7}8}9}
If you run that query, you should see the following result.
1{2"data": {3"allFile": {4"edges": [5{6"node": {7"name": "test"8}9}10]11}12},13"extensions": {}14}
Go ahead and delete test.md since we no longer need it.
Transformer Plugins.
Awesome! Using a Gatsby source plugin we are able to query data about files on our local file system. However, our blog will consist of data in our markdown files. This means we need to be able to query the data in the markdown files and make it available to our frontend code in format that works well with React. For example, once we write our blog posts in Markdown, we need a way to convert it to HTML in order to build our pages. To do this, we need to utilize a Gatsby Transform plugin.
Our First Post
Before we install and configure our plugin, let's write the mardown content for our first blog post. The first holiday we will
write about is New Year's Day. In the blog-posts directory, go ahead and create a file called new-years-day.md. Copy the content
below into it.
1---2title: 'History of New Years'3date: '2020-11-28'4author: 'Awesome Developer'5---67# What is it?89**New Year's Day** is a very popular holiday celebrated by millions of people10around the world.1112# Date Obversed1314**New Year's Day** is oberseved on January 1st, on the first day of the year in the modern [Gregorian calendar](https://en.wikipedia.org/wiki/Gregorian_calendar) and the [Julian calendar](https://en.wikipedia.org/wiki/Julian_calendar).
You can learn more about the Markdown syntax by checking out this Github Guide. However, one thing I want to point out, because we will use it later, is that the following section is called the frontmatter.
1---2title: 'History of New Years'3date: '2020-11-28'4author: 'Awesome Developer'5---
Now that we have our content, let's install the Transfrom plugin that will take our raw data of the post and transform it to a structure we can use in our code.
- Install the plugin
1npm install gatsby-transformer-remark
- Add it to the
gatsby-config.jsfile. Right now we don't need to configure this plugin with any options like before, so we can add just the plugin name to thepluginsarray in the config file. It should look something like this:
1{2resolve: `gatsby-source-filesystem`,3options: {4name: `blogPosts`,5path: `${__dirname}/content/blog-posts`,6},7},8`gatsby-transformer-remark`,
- Restart the development server like we did before.
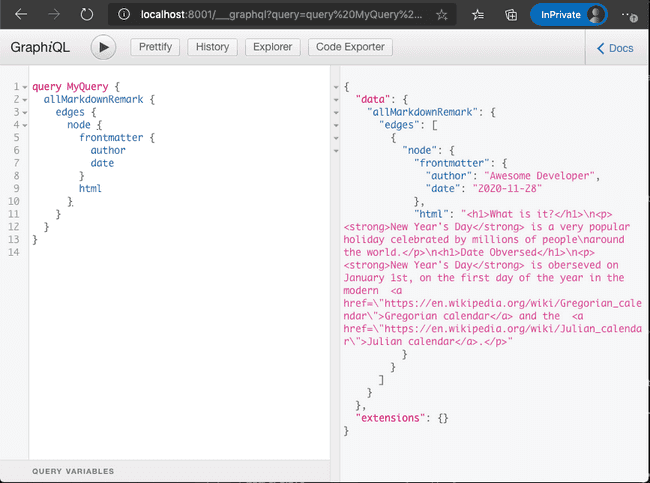
With this plugin installed, we can now query the data in our posts with GraphQL.
Nice 🎉! So far we are able to source data from our file system and transform the data in our markdown files into a format we can use in our code. We got all that just by installing two plugins 😃. The next step is to display a list of posts.
Rendering Posts with React
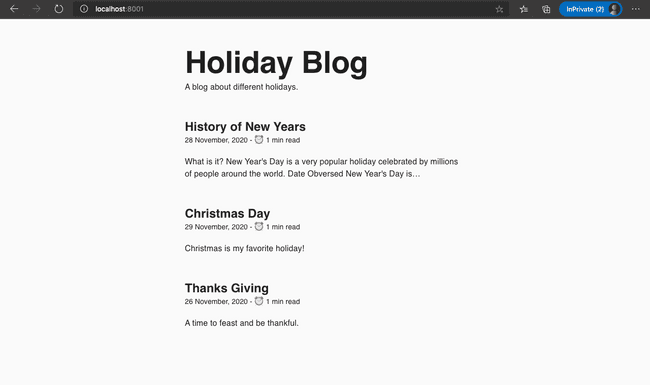
To get our posts to show up on the home page, we need to write our GraphQL query to fetch data in our post files and then loop through the result and render the content. In our home page, we will display the title, date, time to read, and a short excerpt for each post.
Centering our Posts
Before we write our query, we will structure the home page by using a Container component to center our content.
In the index.tsx file change your imports to what we have below. This will organize the imports for the Material UI components,
and then add Container as an import.
1import { AppBar, Container, Toolbar, Typography } from '@material-ui/core'2import { Theme, createStyles, makeStyles } from '@material-ui/core/styles'34import React from 'react'5import SEO from '../components/Seo'
Now let's use the Container component to center our content horizontally. This component has a property, AKA, a prop in React terminalogy,
that will set it's max width. By setting the max width we will prevent content in our blog list from expanding beyond a certain screen size.
While we are it, let's also change the name of the default function exported in index.tsx to something more fitting.
Here is what that will look like.
1export default function HomePage() {23const classes = useStyles()45return (6<div className={classes.root}>7<SEO title="Awesome Material UI Starter" />8<AppBar position="static">9<Toolbar>10<Typography variant="h6" className={classes.title}>11Awesome Material UI Starter12</Typography>13</Toolbar>14</AppBar>15<Container maxWidth="sm">16{' '}1718<Typography variant="h3">Time to code...</Typography>19</Container>{' '}2021</div>22)23}
Page Query
Now we will write the GraphQL query to fetch our data for the post list. More specifically, we will be writing a page query. A page query
is a type of query that provides data to page components in Gatsby. How do we know we are working with a page component? A simple answer
is that any React component defined in a file located in the src/pages directory will be turned into a page that can be navigated to.
Testing Queries
Before we write our query, you can test out your queries by using the graphql editor running at this URL. http://localhost:8000/___graphql.
Updating the HomePage
Right now, the site title also does not match our blog. Let's fix this and the site description by changing the value in the gatsby-config.js file.
By doing this, we can have our page query also provide the correct data for the site title.
1// gatsby-config.js2module.exports = {3siteMetadata: {4title: `Holiday Blog`,5description: `A blog about different holidays.`,6author: `@awesome-developer`,7},8...9};
Restart your development server like before.
Now, update the code in src/pages/index.tsx to have the following code.
1import { Container, Typography } from '@material-ui/core'2import { Theme, createStyles, makeStyles } from '@material-ui/core/styles'34import React from 'react'5import SEO from '../components/Seo'6import { graphql } from 'gatsby'78const useStyles = makeStyles((theme: Theme) =>9createStyles({10root: {11flexGrow: 1,12},13container: {14marginTop: 50,15},16blogTitle: {17fontWeight: theme.typography.fontWeightBold,18},19postList: {20marginTop: 50,21},22post: {23marginBottom: 50,24},25postTitle: {26fontWeight: theme.typography.fontWeightBold,27},28excerpt: {29marginTop: 20,30},31})32)3334export default function HomePage({ data }) {35const classes = useStyles()36const title = data.site.siteMetadata.title37const description = data.site.siteMetadata.description3839return (40<div className={classes.root}>41<SEO title={data.site.siteMetadata.title} description={description} />42<Container maxWidth="sm" className={classes.container}>43<Typography variant="h2" component="h1" className={classes.blogTitle}>44{title}45</Typography>46<Typography>{description}</Typography>47<div className={classes.postList}>48{data.allMarkdownRemark.edges.map(({ node }) => (49<div key={node.id} className={classes.post}>50<Typography variant="h5" className={classes.postTitle}>51{node.frontmatter.title}52</Typography>53<Typography variant="subtitle2">54{`${node.frontmatter.date} - ⏰ ${node.timeToRead} min read`}55</Typography>56<Typography className={classes.excerpt}>57{node.excerpt}58</Typography>59</div>60))}61</div>62</Container>63</div>64)65}6667export const query = graphql`68query {69site {70siteMetadata {71description72title73}74}75allMarkdownRemark {76totalCount77edges {78node {79id80timeToRead81frontmatter {82date(formatString: "DD MMMM, YYYY")83title84}85excerpt86}87}88}89}90`
Here is what your blog should look like at this point. I added two more markdown files with content to show the list of posts. Feel free to do the same.
We added a lot of new code, so let's go through what was added starting with the page query.
Adding the Query
In line 69, we have created a GraphQL query which allows us to get just the data we want, nothing less, and nothing more.
- To get this working, we first had to import the
graphqltag function fromgatsbyas you can see in the import section of the code snippet. - We export the
queryvariable (can be named anything) that contains the query string for our data, which Gatsby will take out and parse during build. - In our
HomePagecomponent, a prop calleddatais passed to it. This data prop is an object that contains the result of our query in the same shape we requested it in. Gatsby will provide this automatically to the page component.
Using our data
In the code, we reference the values we need just like we would when referencing keys in JavaScript objects. In our code, we reference the data
we want by following the hierarchy of the nested keys and objects in the data object.
Styling
To give our blog the look it has, we have to add styling with css. However, we are not using typical css, we are using css-in-js, which
we can do by using Material UI's styling api.
Let's break it down.
- First we call a function called
makeStyleswith a callback function as the parameter. - This callback function for
makeStylestakes a theme object as a parameter and returns an object with keys that are css selectors and each key has an object that contains the css properties we want to change. Here is an example from our styling above.
1blogTitle: {2fontWeight: theme.typography.fontWeightBold3},45// blogTitle will be turned into a css class selector6// fontWeight is the css property we are changing.
makeStyleswill then return a special function in called aReact Hook. These type of functions have to start with the prefixuse, so in thise case we are calling ituseStyles.- To access our class names from the styles we created, we just call
useStyleswhich will return an object containing our class names. To provide set the class names for our elements and components, we just have to reference the key in the classes object.
Rendering our data
The post data we want to render is stored in data.allMarkdownRemark.edges which is an array. To access and render the data, we call the
map function. This function takes a callback function that will process each node of data in the edges array. The way we process it in this
example is by generating a div element for each post node that renders Typography components with our data.
Linking to Blog Posts
At this point we have created our home page and it has all our blogs listed for our readers. The next step is to link each post in our home page to a page that has all the contents of the blog post. This will make our blog much more interesting!
We have learned we can have new pages created by placing them in the src/pages directory, but to do this for every blog post will be a lot of
manual work and pretty tedious. What we need to do, is generate our pages programmatically. We want a way for Gatsby to know we added
a new markdown file and automatically create the blog post page for us and then link to that page.
One way to generate a link to our blog post page, is to create a slug. A slug is the unique identifying part of the url that identifies
a resource being served. By creating a slug, we will be able to have unique link to each blog post. In this case, we will create our
slugs from the names of our markdown files and then go on to create our pages.
In order to create a page for each blog post, we need to implement two Gatsby API methods, onCreateNode and createPages. We do this by exporting a function
with the name of the API method in gatsby-node.js.
This file is not available by default, so go ahead and create a file called gatsby-node.js in the root of your project folder.
Implementing onCreateNode
Add the following code to the file, then stop restart the development server.
1exports.onCreateNode = ({ node, getNode, actions }) => {2const { createNodeField } = actions34if (node.internal.type === 'MarkdownRemark') {5createNodeField({6node,7name: `slug`,8value: `/blog/${getNode(node.parent).name}/`,9})10}11}
Our implementation of the onCreateNode is adding a new field called slug to nodes of type MarkdownRemark. We want to add
the slug field to MarkdownRemark nodes because this is the type of node created by gatsby-transformer-remark for each markdown file
we have in our project. For each node we create, we are also adding the slug value.
How are we getting the slug value? The slug value is created from the name of the markdown file which we access by looking at the
parent File node, which has the data, such as the file name, about files in our file system.
If you console log the result of creating the slug, you should see the path in the console after stopping and restarting the development server.
1exports.onCreateNode = ({ node, getNode, actions }) => {2const { createNodeField } = actions34if (node.internal.type === 'MarkdownRemark') {5console.log(`/blog/${getNode(node.parent).name}/`)6createNodeField({7node,8name: `slug`,9value: `/blog/${getNode(node.parent).name}/`,10})11}12}
Make sure to remove the console.log statement once you no longer need it.
Implementing createPages
The next step in this process is to implement the createPages API method to programmatically create pages for our blog posts.
In order to create our pages, we need to query the data with GraphQL and map the result to each page. The other component of this process
that we need to do, is to implement a template component for reach page we create. This way, the pages will always have similar look and feel.
First, let's go head and create an initial template. In the src directory create a new directory called templates and add a file called
BlogPost.jsx in there. Add the following code to it. This will render a Container with a max width set to small screens, and a div containing the text Blog Post Template.
1import { Container } from '@material-ui/core'2import React from 'react'34export default function BlogPost() {5return (6<Container maxWidth="sm">7<div>Blog Post Template</div>8</Container>9)10}
Now, let's implement the createPages method to utilize our template. Copy the following into the gatsby-node.js file.
1exports.createPages = async ({ graphql, actions }) => {2const result = await graphql(`3query {4allMarkdownRemark {5edges {6node {7fields {8slug9}10}11}12}13}14`)1516result.data.allMarkdownRemark.edges.forEach(({ node }) => {17actions.createPage({18path: node.fields.slug,19component: require.resolve(`./src/templates/BlogPost.jsx`),20context: {21slug: node.fields.slug,22},23})24})25}
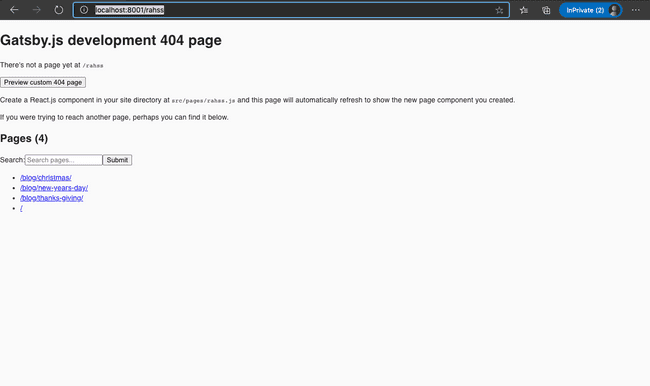
If you stop and restart the server and got to a random url like http://localhost:8001/rahss, you should see a list of page routes
that are available on the site including the ones just created.
Just like we wrote a query for the index page to fetch data for our posts lists, this time we will write
and export a query in the BlogPost.jsx file to fetch data for a post by the value of the slug. GraphQL queries can
accept parameters. Therefore we will pass the slug as a parameter to get data for a markdown node with the given slug.
Putting it together, our template now looks like this.
1import { Container, Link, Typography } from '@material-ui/core'2import { Link as GatsbyLink, graphql } from 'gatsby'3import { Theme, createStyles, makeStyles } from '@material-ui/core/styles'45import React from 'react'67const useStyles = makeStyles((theme: Theme) =>8createStyles({9blogTitle: {10fontWeight: theme.typography.fontWeightBold,11},12})13)1415export default function BlogPost({ data }) {16const classes = useStyles()17const post = data.markdownRemark1819return (20<Container maxWidth="md">21<Link component={GatsbyLink} to="/">22Home23</Link>24<Typography variant="h3" component="h1" className={classes.blogTitle}>25{post.frontmatter.title}26</Typography>27<div dangerouslySetInnerHTML={{ __html: post.html }} />28</Container>29)30}3132export const query = graphql`33query($slug: String!) {34markdownRemark(fields: { slug: { eq: $slug } }) {35html36frontmatter {37title38}39}40}41`
One thing I want to call out is the use of the Link component from Gatsby. This component useful for internal linking between
our pages since it will make page loads very fast by prefetching the required resources.
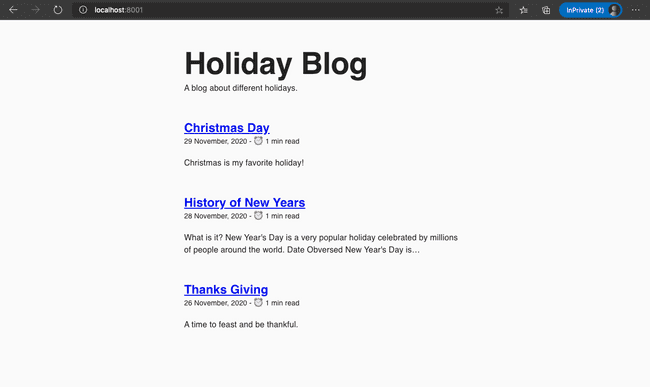
The last thing left to do, is to link the posts in the home page to their respective blog post page. To do this, we need to update our query to fetch the slug and use this slug to create our link. Here is what that looks like.
1import { Container, Typography } from '@material-ui/core'2import { Link, graphql } from 'gatsby'3import { Theme, createStyles, makeStyles } from '@material-ui/core/styles'45import React from 'react'6import SEO from '../components/Seo'78const useStyles = makeStyles((theme: Theme) =>9createStyles({10root: {11flexGrow: 1,12},13container: {14marginTop: 50,15},16blogTitle: {17fontWeight: theme.typography.fontWeightBold,18},19postList: {20marginTop: 50,21},22post: {23marginBottom: 50,24},25postTitle: {26fontWeight: theme.typography.fontWeightBold,27},28excerpt: {29marginTop: 20,30},31})32)3334export default function HomePage({ data }) {35const classes = useStyles()36const title = data.site.siteMetadata.title37const description = data.site.siteMetadata.description3839return (40<div className={classes.root}>41<SEO title={data.site.siteMetadata.title} description={description} />42<Container maxWidth="sm" className={classes.container}>43<Typography variant="h2" component="h1" className={classes.blogTitle}>44{title}45</Typography>46<Typography>{description}</Typography>47<div className={classes.postList}>48{data.allMarkdownRemark.edges.map(({ node }) => (49<div key={node.id} className={classes.post}>50<Typography51variant="h5"52className={classes.postTitle}53component={Link}54to={node.fields.slug}55>56{' '}5758{node.frontmatter.title}59</Typography>60<Typography variant="subtitle2">61{`${node.frontmatter.date} - ⏰ ${node.timeToRead} min read`}62</Typography>63<Typography className={classes.excerpt}>64{node.excerpt}65</Typography>66</div>67))}68</div>69</Container>70</div>71)72}7374export const query = graphql`75query {76site {77siteMetadata {78description79title80}81}82allMarkdownRemark {83totalCount84edges {85node {86id87fields {88slug89}90timeToRead91frontmatter {92date(formatString: "DD MMMM, YYYY")93title94}95excerpt96}97}98}99}100`
Conclusion.
Congratulations 🎉🎉🎉!! At this point you should have a working blog. Now I recommend taking a break and then coming back to review some of the code you added to your project to help it stick.
Now that we have the MVP, the next step is to work on improving the look and feel, adding support for other features, and deploying it.
If you want to create a Tech Blog, there are plugins for rendering code, syntax highlighting, and much more available on the plugin page.
I hope this post was useful and got you curious about Gatsby, Material UI, and React.
Challenge.
As a challenge, see if you can utilize a Plugin to add images to your blog posts, and use GraphQL to order your posts in the home page by date. I will be making future posts on these features, so make sure to be on the lookout for the content.

